StratoLab
Lesson 7: Using the OLED Module
Pre-requisites
- Complete Lesson 1: Blinking Light
- Thonny Python IDE installed on your computer
- All necessary hardware components
Objectives
- Use breadboard to wire the OLED module to the Raspberry Pi Pico
- Install the supported library to the Raspberry Pi Pico for the OLED device
- Write code to display information on the OLED
Results
- Installing supported MicroPython libraries using Thonny IDE
- Understanding how to interface with an I2C display device
Steps
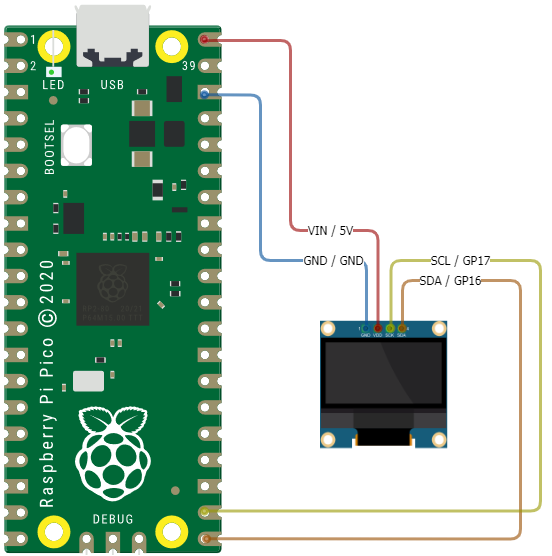
Wire the SSD1306 OLED display module to the Raspberry Pi Pico.
IMPORTANT Before wiring your Pico, UNPLUG IT FROM YOUR COMPUTER. If plugged in while wiring, you risk damaging the Pico or SDCard reader.
| SSD1306 Pins | Description | Pi Pico Pins |
|---|---|---|
| GND | (Ground): Connect to the ground pin on Pico | GND (38) |
| VCC | (Voltage Common Collector): Provides power to the module. Connect to the 3.3V pin on Pico | 3V3 (36) |
| SCL | (Serial Clock): Accepts clock pulses from the Pico to synchronize data transmission | GP17 (22) |
| SDA | (Serial Data): Used for data exchange | GP16 (21) |
Install the SSD1306 Library
Some modules are supported by existing drivers, or libraries offered from within the Thonny IDE. the SSD1306 is one such module with a supported library. This makes interfacing with the device and writing your application code much easier!
-
Connect your Raspberry Pi Pico to your computer using the USB cable.
-
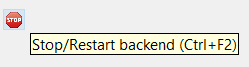
Open the Thonny IDE. Stop/Restart the backend to refresh the connection.
-
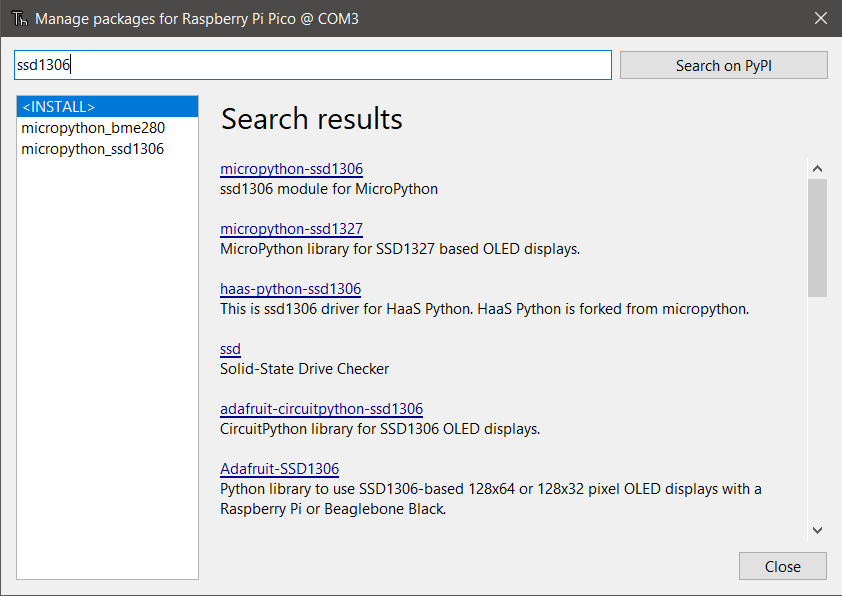
Click Tools then Manage Packages
-
Type “ssd1306” in the search bar and click Search on PyPi
-
Select the micropython-ssd1306 option from the search results.
-
Click Install. This will install the supported library for the SSD1306 OLED device.
-
Click Close
Print Information to the SSD1306 OLED
The steps in this section will use the previous hardware and driver sections to write information to the SSD1306 OLED display. The code example for this lesson is located in Lesson 7: /src/main.py.
-
Using Thonny, open the
main.pyfile in Lesson 7: /src/main.py. -
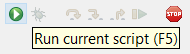
Run the script.
A message will be displayed on the OLED screen.
Congratulations! You have successfully completed Lesson 7.