StratoLab
Lesson 1: Introduction and how to get started building the StratoLab
Objectives:
- Students will learn the components used for this project
- Gain a basic understanding of electronics to complete the project
- Ensure the Integrated Development Environment (IDE) can connect to the microcontroller and upload code
What you will be using:
- Raspberry Pico

- Breadboard

- BMP-180 - Barometric Pressure/Temperature/Altitude Sensor

- GPS Module

- Micro SD card

What you will be learning:
What do all these parts do anyways?
Microcontroller
- Made up of integrated circuits
- Interprets data from inputs and takes action via outputs. Some examples you may have encountered are:
- Detect if a door is open then sound an alarm
- Determine if it’s dark, then turn on a light
- Sense its hot and turn on a fan
- Multiple actions can be taken with complex decisions software determines. An example:
- Thermostat:
- If its nighttime keep temperatures cooler
- Determine if its night
- Reduce temperature
- If its hot turn on the air conditioning
- If its cold use less heat
- Reduce temperature
- Determine if its night
- If its nighttime keep temperatures cooler
- Burglar alarm:
- Determine if the alarm is set
- If a window is broken sound an alarm
- Dispatch a security company to look for intruder
- If a window is broken sound an alarm
- Determine if the alarm is set
- What are some other things you encounter that may be based on microcontrollers?
- Thermostat:
Breadboard
- Fun Fact, the name breadboard came from the origin of the device. Amateur Radio operators used cutting boards (sometimes used for cutting bread) to build circuits for testing their designs
- A breadboard is a piece of plastic with conductive material layered in channels in order to prototype circuits without having to solder anything
- There are three main parts to a bread board, the power rails, the terminal strips, and the DIP support channel.
- The DIP support channel is the channel that runs through the middle of the board. It splits the terminal strips into two and makes it so many different integrated circuits can be used while taking up minimum space on the breadboard. Each pin of the IC (integrated circuit) is unique and needs to be separate from the other pins, hence the need for a channel that breaks up the terminal strips.
- Terminal strips are the strips of metal that connect the rows of pins, they are hidden, but important. This means that all of the holes on either side of the DIP channel are connected to each other.
- The power rails are typically accompanied by a blue or red line. These are used to provide a power source and a common ground. Blue means negative or ground and red means positive or power.
<img src=assets/images/HabBreadboard.jpg width=”50%” > - The red and blue arrows are pointing to the positive and negative power rails respectively. The yellow arrow is illustrating which pin are connected. The pins are connected in the same direction as the yellow arrow, but separated by the channel in the middle. They are connected horizontally and not vertically in this picture.
- If you want more information on breadboards please refer to <a href=https://learn.sparkfun.com/tutorials/how-to-use-a-breadboard/all title=”How to Use a Breadboard”>This article</a>
- IT’s VERY important to keep in mind polarity:
- Electronics only work one way, if you connect the positive wire to the negative terminal, and the negative wire to the positive terminal, you may ruin the component you are working with. We don’t want to release the magic smoke!!
LED
- LED stands for Light Emitting Diode
- LED’s are semiconductors that light when current flows through them
- LED’s have polarity which means the way power is appliec should be done only one way! On the bottom of the LED’s in the kit, you will notice the leads are different lengths
- Anode (longer) is positive
- Cathode (shorter) is negative
- Where do you have LED’s around you throughout your day?
Resistors
- Resistors are used to reduce current in a circuit
- Resistors will be used with LED’s in Lesson 2
- For the work we are doing you an experiment with different resistors and see what they do with the brightness of your LED’s in Lesson 2
- Resistors used in this project look like a piece of wire with a ceramic body on them shaped like a barrel
- There are many different kinds of resistors in the wild and they can look very different or even be embedded in circuit boards and chips.
- Resistors have a series of bands that identify how much resistance they have
- Resistance is measured in OHM’s. The value is noted by the colors and orders of the bands on the side of the resistor. have a look at the ones in the kit
- Ohm’s law can be used to calculate your needs based on different situations
BMP-180
- This small sensor allows us to measure the temperature and barometric pressure
- This device uses something called I2C which allows many devices to be connected to the same pins on the microcontrolles but have unique address’s to identify each component
- This allows sensors like the BMP-180 to provide readings to be taken by multiple devices but only using two pins on the microcontroller.
- A use for this would be to have multiple BMP-180 sensors reading the temperature inside the payload and another measuring outside or even on various things in the payload
- This allows sensors like the BMP-180 to provide readings to be taken by multiple devices but only using two pins on the microcontroller.
GPS Module
- This device is the actual component (components actually) to allow us to track latitude, longitude, altitude, time in UTC, and track how many satellites signals received to determine accuracy as well as its just plain cool to know!
- GPS stands for Global Positioning System which in short triangulates the devices position based on details from multiple satellites (4 or more, the more satellites in the calculation the more accurate the reading)
- The model we are using is extremely accurate and consists of two pieces, the board and the antenna. location can be determined withing inches!
- To work best the antenna needs unobstructed access to the sky, sometimes however the readings can work inside a building. When working on the GPS lab this is an error you may encounter.
- What are some things that use GPS technology that you know of?
SD Card Reader
- This device will be used to write data for later interpretation. The software written will save data every 30 seconds to track details throughout the flight
- SD cards come in two sizes, we will be using micro SD cards in an adapter to allow them to be read by multiple types of SD readers on computers
- SD stands for secure digital
Basic guide to electronics safety
-
Like many things, attention to detail will likely seperate success from frustration as labs are completed. Close attention and validation will keep teams on track.
-
While working with any type of electronics, in this case an Arduino, make sure that the surface that you are working on is not conductive. Some examples of suitable materials to work on are plastic tables or wooden tables. Stay away from any metal surfaces so you do not short the components that you are working on.
-
Static is the enemy of electronics and electronic components. Grounding yourself before handling things is always a good idea. You can do this by touching something like the bare metal on your desk / table etc.
- You can use a multi-meter to check your circuits and measure values of components or leverage the continuity tester on the meter to check faulty connections
- When doing continuity testing always ensure NO power is applied to the circuit(s).
- When working with microcontrollers, always ensure they are unpluged from the computer and power while wiring components together into a circuit(s)
- ALWAYS double check the instructions to ensure your circuit is wired correctly. All the lessons have detailed pictures AND charts to help
- Have another group member or even two double check the other persons work
- NO MAGIC SMOKE should be released!
Getting started with the IDE
This project will be using the Thonny Integrated Development Environment. Thonny acts as the interface between the code you write and the Raspberry Pi Pico microcontroller.
Let’s give it a try!
- Download Thonny from the Thonny website and install it
- Connect your Raspberry Pi Pico using the USB cable
ℹ️ Connecting a brand new Raspberry Pi Pico
If this is a brand new Raspberry Pi Pico, you will need to load MicroPython onto the microcontroller to allow Python code to execute. If you see the errorCouldn't find the device automatically., this means you will need to load MicroPython onto the Pi Pico microcontroller. Follow the steps below to install MicroPython onto the Pi Pico using Thonny.a. With the Pi Pico plugged in, select Run -> Configure Interpreter from within Thonny
b. For Which kind of interpreter should Thonny use for running you code? choose MicroPython (Raspberry Pi Pico) from the list. Leave all other options as default, but do not click OK yet
c. Click Install or update MicroPython
d. Click MicroPython variant and choose the version of MicroPython specific to your Raspberry Pi Pico hardware type. If your Pi Pico supports wireless, choose the option withPico WHoption. Otherwise choosePico H
e. Select the latest version of MicroPython
f. Click Install
g. Click Close
h. Click OK -
Using Thonny, download and open the
main.pyfile in Lesson 1: /src/main.py. You will choose This Computer and search for the directory of this project.Take some time to read the comments in this code so you understand what is happening, this will help you later in the lesson. In Python, comments are marked with an ‘#’.
-
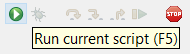
Run the script.
Congratulations! You have successfully completed Lesson 1.
Troubleshooting
-
ERROR: Couldn't find the device automatically.If you encounter this error it’s likely a result of MicroPython not being loaded onto the Raspberry Pi Pico. This usually occurs with a brand new Pi Pico device. Follow the steps in the above lesson to install MicroPython to the controller.